Step 1 — Open the Student Sign-up page
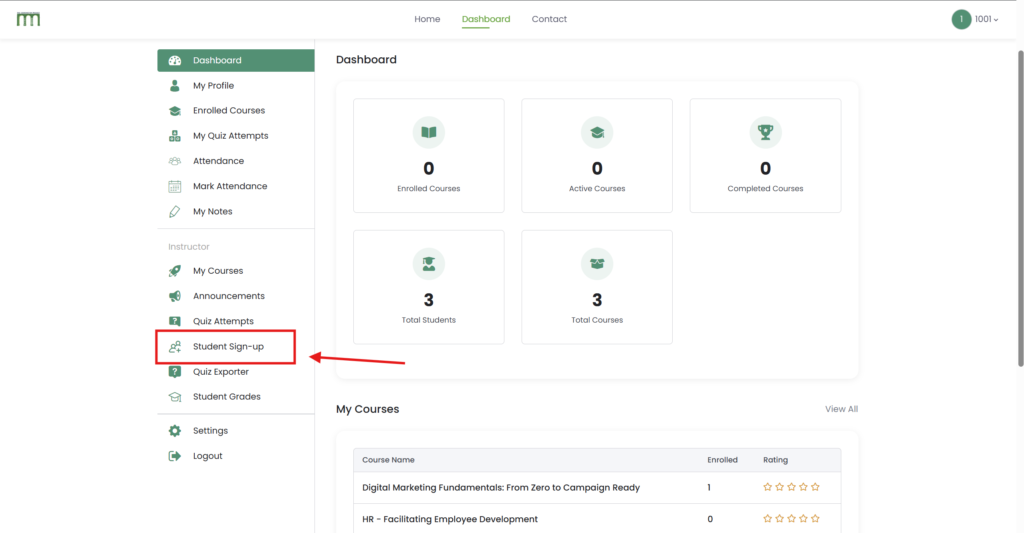
- Log in to your account.
- Go to your Dashboard
- In the left-hand sidebar, click Student Sign-up.
Step 2 — Choose the course you want to manage
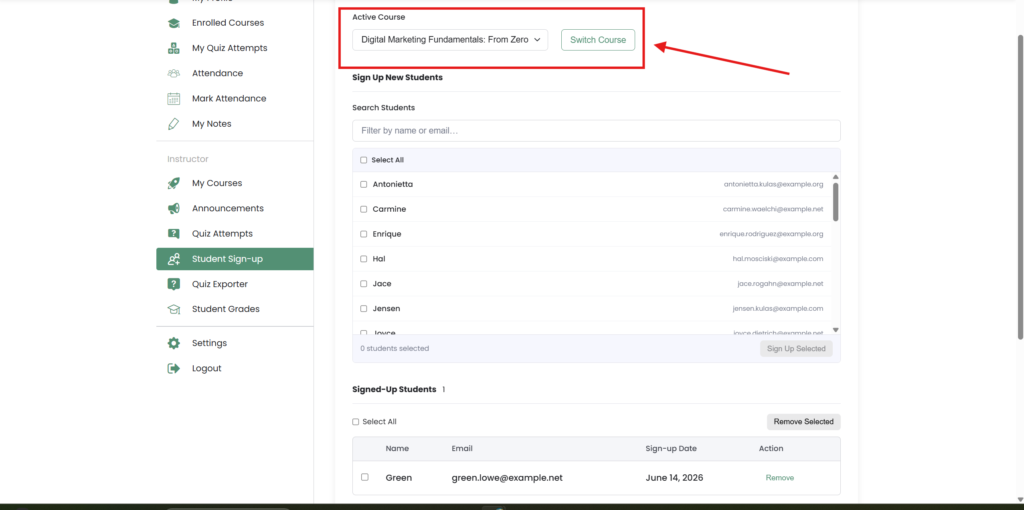
At the top of the page is an Active Course dropdown listing every course you can manage.
- Click the dropdown and select a course.
- Click Switch Course.
The page reloads showing the sign-up tools and the signed-up student list for that course.
Step 3 — Sign up new students
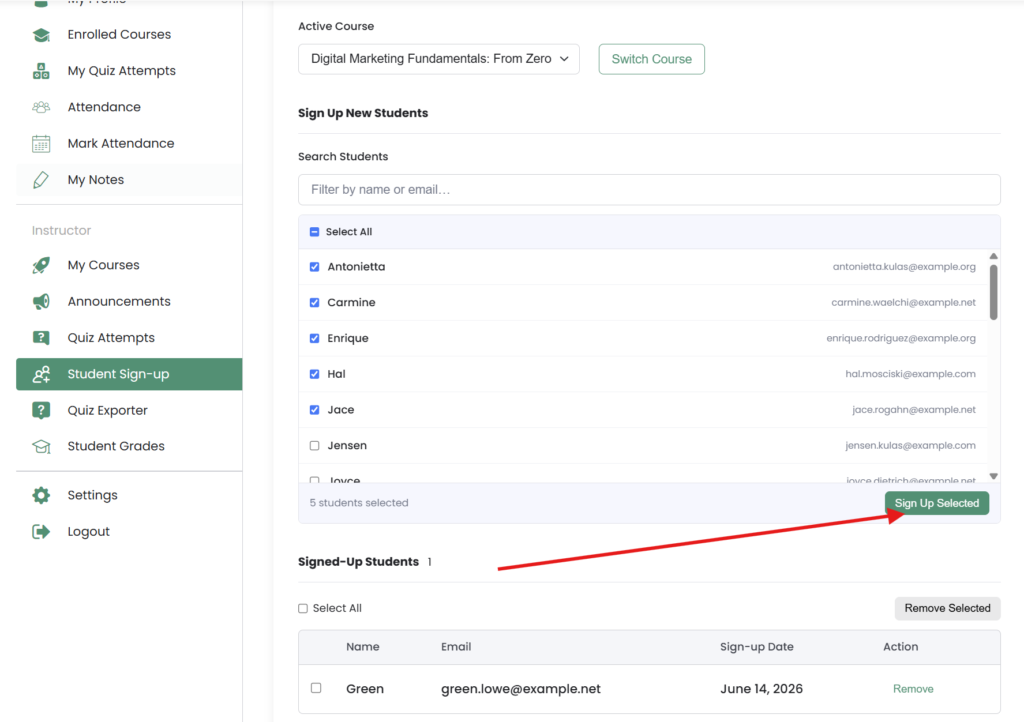
In the Sign Up New Students section you’ll see a scrollable list of all students who are not yet signed up for the selected course. Each row shows the student’s name and email.
- (Optional) Search. Start typing a name or email in the Search Students box. The list filters instantly as you type.
- Select students. Tick the checkbox next to each student you want to sign up. You can also tick Select All to select everyone
currently shown in the list. - Check the counter. The footer shows how many students are selected (for example, “3 students selected”).
- Click Sign Up Selected.
A green confirmation message appears at the top of the page when the students are signed up.
Step 4 — View and manage signed-up students
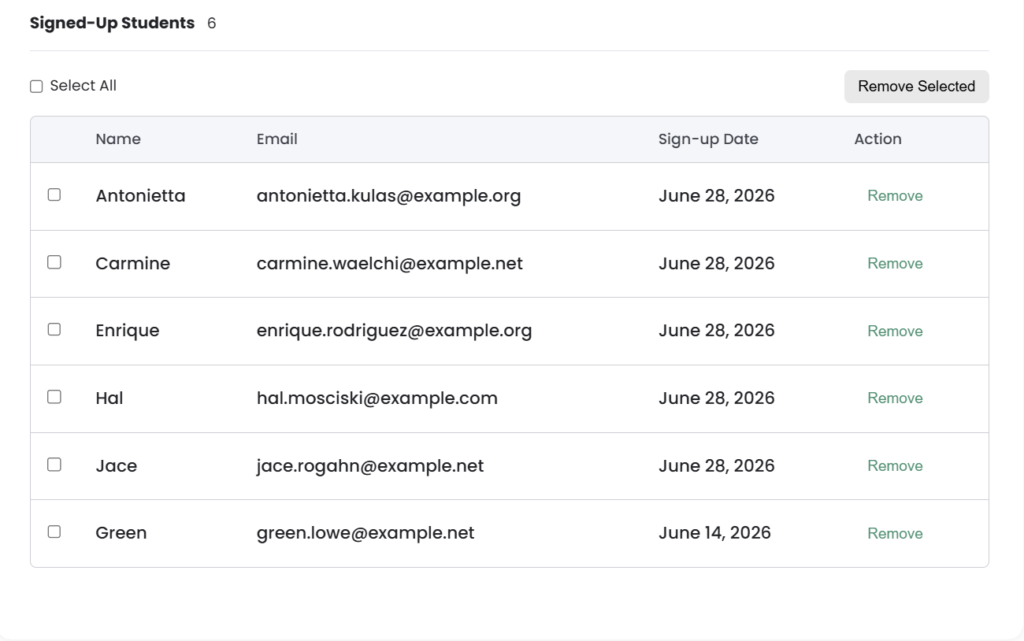
Below the sign-up section is the Signed-Up Students table for the selected course. It shows each student’s Name, Email, and Sign-up Date.
Remove one student
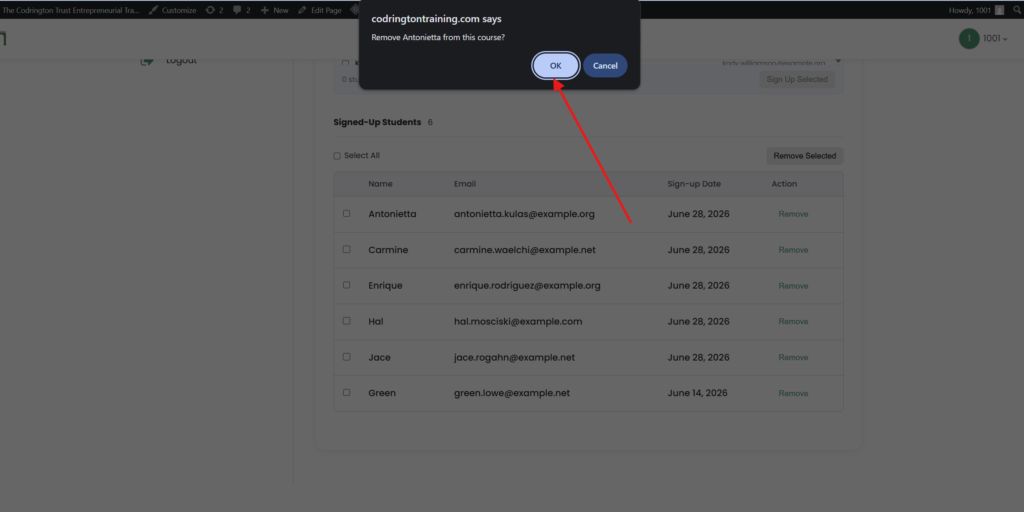
- Find the student in the table.
- Click the Remove button on their row.
- Confirm when prompted.
Remove several students
Confirm when prompted.
Tick the checkbox beside each student you want to remove — or tick Select All at the top of the table to select everyone.
Click Remove Selected.


